How to Update Nvidia Drivers: A Step-by-Step Guide
Whether you’re using an older graphics card or one of the latest models, keeping your graphics drivers up to date is essential. For most users with Nvidia GPUs, this means utilizing Nvidia’s GeForce Game Ready drivers.
New driver updates can enhance performance and stability, making it necessary to learn how to install them quickly. But what should you do if an update causes issues? Knowing how to uninstall and reinstall drivers can be invaluable in these situations.
No need for third-party programs when updating or uninstalling your Nvidia Game Ready drivers; a Windows PC and a few minutes are all you require. This guide will help you navigate both processes, turning potentially cumbersome tasks into quick actions.

How to Update Drivers via GeForce Experience
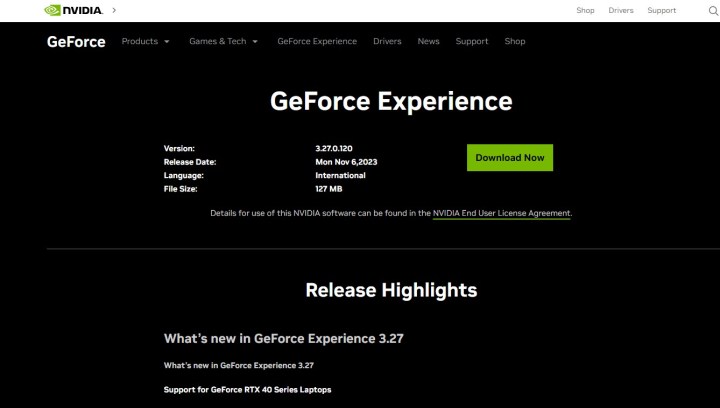
The most convenient method to update your drivers is through Nvidia’s GeForce Experience, a utility that simplifies the driver update process along with optimizing game settings and capturing gameplay footage. Keep in mind that it cannot roll back drivers.
Step 1: First, download and install the Nvidia GeForce Experience from the official Nvidia website. Follow the setup instructions and create an account.
Once installed, launch the application, which will automatically detect your graphics card.

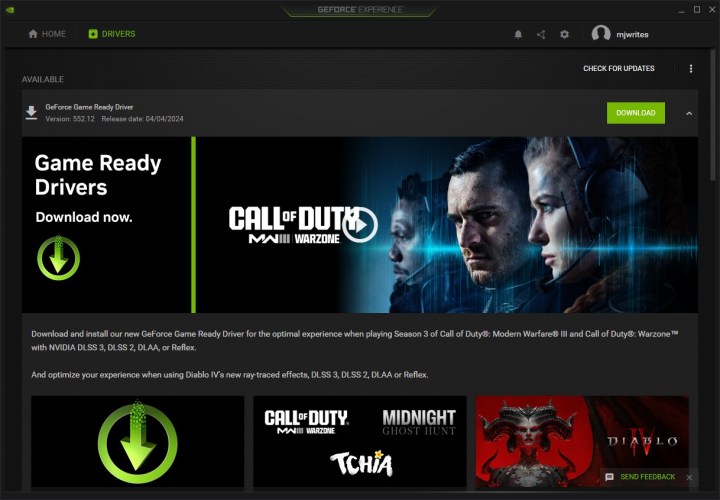
Step 2: To update drivers using GeForce Experience, click on the Drivers tab at the top left. Use the Check for updates option to find the appropriate drivers for your GPU.
Make sure to select the Game Ready driver instead of the Studio driver, which is primarily for professional use. Click Download to get the latest driver.

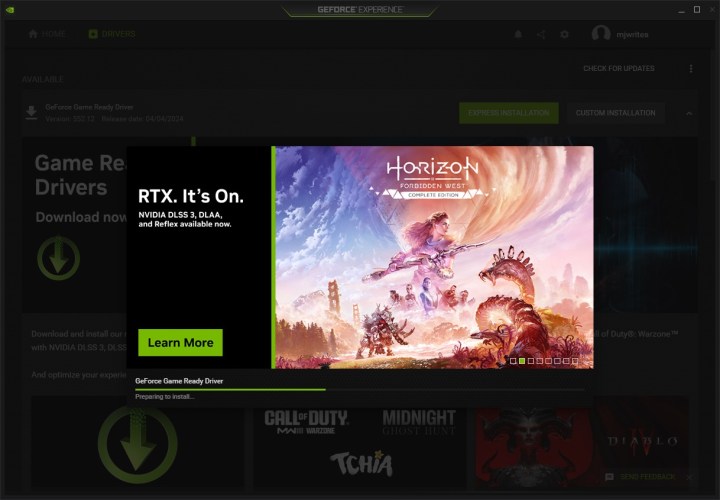
Step 3: You will then choose between an Express installation and a Custom installation. The Custom installation allows you to select additional components, such as audio drivers or Nvidia software. You can also opt for a clean installation that resets settings to default.
For most users, the Express installation is recommended. Select it, and the installation process will begin. You may be prompted for additional permissions; make sure to grant them.
Your screen might flicker during installation—that’s normal. After a few minutes, you’ll have successfully updated your driver.

How to Manually Update Game Ready Drivers
If you prefer not to use GeForce Experience, you can manually update your drivers. While this method requires more effort, it is straightforward once you gather the necessary information about your GPU model. If you’re unsure of your GPU details, refer to our guide for assistance.
Step 1: Go to Nvidia’s driver download page. You will see several dropdown menus. Make sure to know your graphics card model so you can provide the correct information to download the driver.
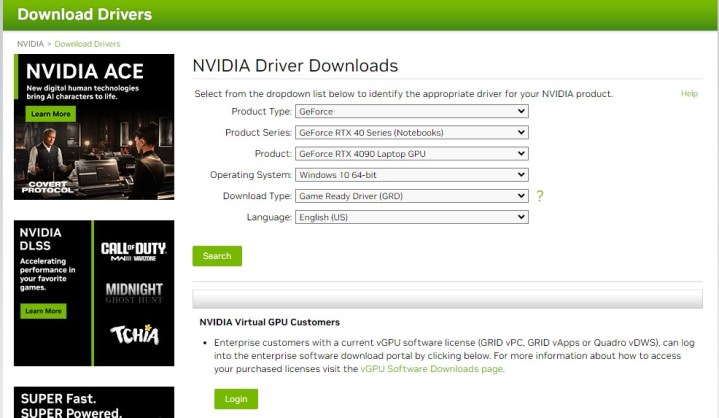

Step 2: Under Product Type, select “GeForce.” For Product Series, choose your graphics card’s generation and whether it’s for a laptop or a desktop. Then, pick your exact GPU model under Product.
Choose your operating system from the respective dropdown. If you’re unsure, we have a guide that explains how to check your PC specs. Lastly, ensure Download Type is set to Game Ready Driver (GRD).
Step 3: After downloading the appropriate file, launch the installer and decide where to extract the files. You’ll then have the option to install just the driver or GeForce Experience alongside it.
As with the previous method, you can choose between Custom and Express installation. We advise selecting Express for simplicity. The installation will start, and you may notice your screen flickering during this time, which is perfectly normal.
After following these steps, your Game Ready driver will be fully updated.
How to Uninstall Game Ready Drivers Using Add or Remove Programs
If you need to uninstall your driver, there are three methods you can use: through Add or remove programs, the Device Manager, or a third-party tool like Display Driver Uninstaller. In this section, we will focus on using the Add or remove programs feature, which is a straightforward way to remove Nvidia drivers.
This approach allows you to uninstall supplementary software as well, while Device Manager is limited to just the driver itself.
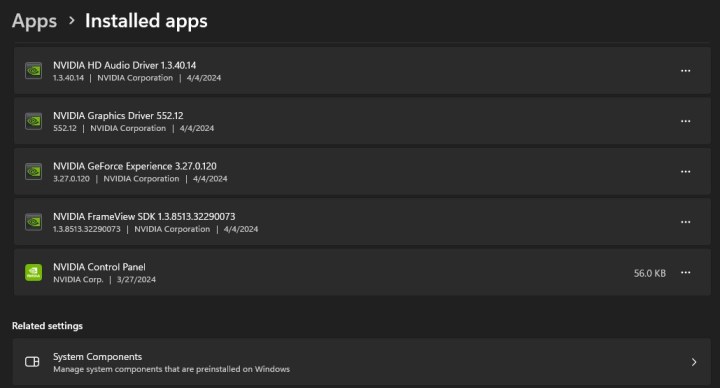
Step 1: Click the Windows icon on the taskbar and type in Add or remove programs. You can also access this via the Start menu, clicking on the Gear icon for Settings, then navigating to Apps and selecting Installed apps.
Step 2: In the Add or remove programs interface, type Nvidia into the search bar. This will display a list of installed Nvidia software, including GeForce Experience, the Nvidia Control Panel, and the driver itself.
Step 3: Find the Nvidia Graphics Driver in the list, click the three horizontal dots next to it, and select Uninstall. Proceed through the uninstaller steps and choose to remove all driver components for a thorough cleanup. Restart your PC to complete the uninstallation.
Important note: After uninstalling, your PC will revert to a basic graphics driver, which may limit functionality such as dual monitors or resolution settings. To restore full capabilities, perform a clean driver installation using the previously mentioned instructions.

How to Uninstall Game Ready Drivers via Device Manager
Using Device Manager to uninstall Game Ready drivers is another simple option, though it may not be as thorough as the previous methods. It’s effective for removing drivers that are causing issues or for rolling back to an earlier version.
Step 1: Open Device Manager by right-clicking the Start button and selecting it from the menu, or by searching for Device Manager in the search bar.
Step 2: Find the Display adapters section, which lists your graphics card(s). Right-click on the GPU you wish to uninstall the driver for and select Properties.
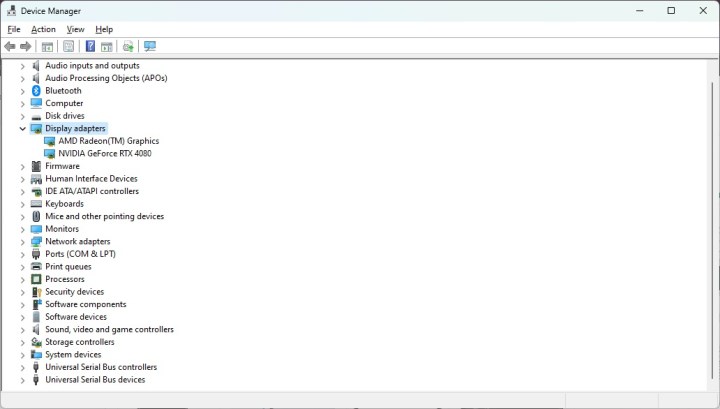

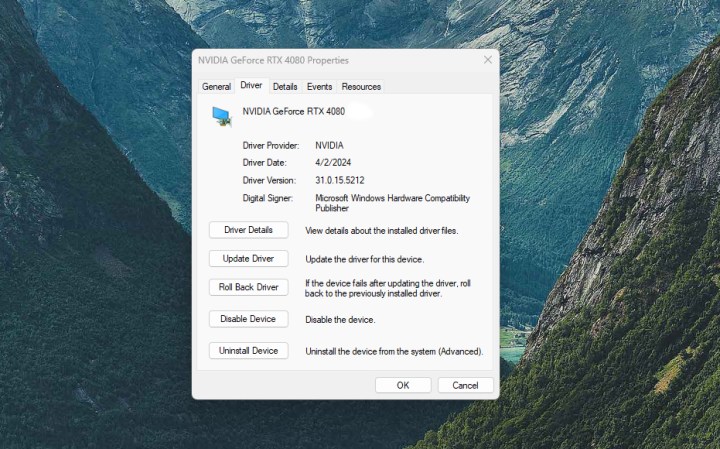
Step 3: You can choose to roll back the driver or proceed with the uninstallation by clicking Uninstall Device.
Confirm the action when prompted. If available, check the box to Delete the driver software for this device to ensure complete removal. Click Uninstall and restart your computer to finish the process.
Keep in mind that your system will only have a basic graphics driver afterward, leading to potential performance issues, low resolutions, and other limitations until you reinstall your preferred Game Ready driver.

How to Uninstall Game Ready Drivers Using DDU
Display Driver Uninstaller (DDU) is a reliable tool for thoroughly erasing all remnants of a GPU driver. It’s especially useful when switching to a different vendor, such as moving from Nvidia to AMD, as it ensures a clean slate.
DDU is compatible with AMD, Intel, and Nvidia drivers and works on both Windows 10 and 11.
Step 1: Download Display Driver Uninstaller from the official site and extract the files.
Step 2: For best results, it’s advised to run DDU in Safe Mode. If you’re uncertain how to access Safe Mode, check our guides for doing so on Windows 10 and 11.
Doing this prevents other programs from interfering with the uninstallation and stops Windows from automatically reinstalling the driver.
Step 3: After entering Safe Mode, open the folder where you extracted DDU and launch the application. You can close the options menu that appears, as no changes are necessary.
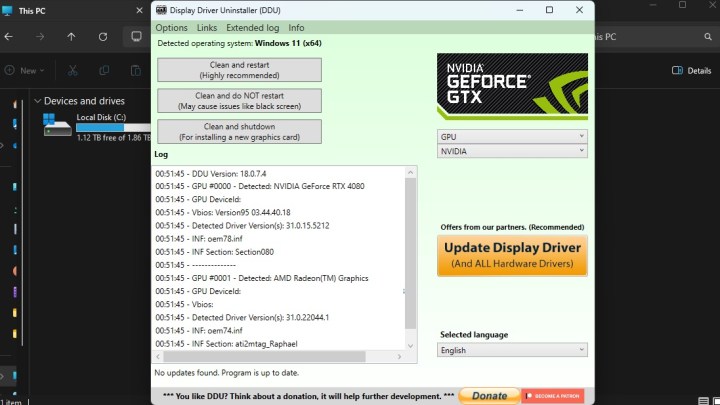
Step 4: Select Nvidia from the dropdown menu to specify your GPU vendor.
Step 5: Choose from three options: Clean and restart, Clean and do not restart, or Clean and shutdown. We recommend Clean and restart, which you should select now.
DDU will execute several commands to completely remove your Game Ready driver. Your PC will then automatically restart, leaving you to install the new Nvidia Game Ready driver once more, as only the basic Windows graphics driver will be running.

These steps are specifically tailored for Nvidia drivers. If your setup includes an AMD GPU, be sure to check our guide on updating AMD drivers for assistance.


